Have a Question? (866) 332-7881
Back to store

Thursday, December 30, 2021

9 RV Accessories for Safety, Convenience, and Happiness


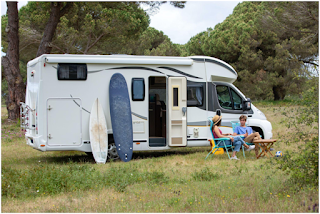
Owning your own RV is never short of its trials and tribulations. The experience itself is second to none, as you can simply take your entire life on the open road with you whenever you see fit. However, there are a lot of mishaps that can occur and an abundance of precautionary steps are necessary to take.

While you need to properly stock your RV with the appropriate gear and tools for seamless riding and living, you aren’t granted much room for everything you need. That is precisely why you need to make sure that everything you have in your RV is extremely practical and serves an applicable purpose.

RV accessories can do just that. We have compiled a list of nine accessories for your RV or motorhome that are not only convenient but also highly functional to provide you with optimal RV living.

1.Extend-a-Shower Shower Rod
When it comes to showering in your RV, you shouldn’t have to feel cramped or uncomfortable. Showering is your personal time and you deserve to relax while doing so. That is precisely why the Extend-a-Shower shower rod has made it to our list. It provides about 30% more elbow room while showering, but can neatly inverse when it isn’t being used.

2.Rope Lights


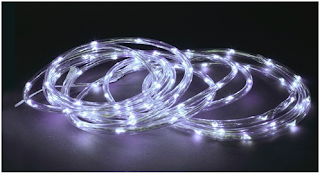
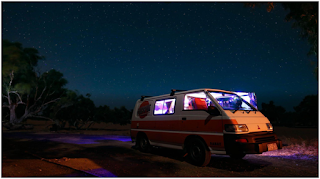
Lighting is a vital step in making for a comfortable and enjoyable home. Plus, who doesn’t love being able to see in the dark? When decorating the interior (or exterior, even) of your RV, be sure to add some rope lights to your decor.

While these may not seem like “necessary” RV accessories, we believe that they are. When you are camped out in a dark location, getting around your RV or even outside of it entails convenient lights so you can appropriately see your surroundings. Not only that, but they also provide you with an unbeatable ambiance!

3.RV Air Conditioner Baffle
During the warmer months, you know that you depend on your air conditioning unit to keep you cool and comfortable while indoors. However, what about when you’re trying to sleep and the noise from it is simply driving you nuts, causing you to have trouble sleeping at all?

That is where the RV air conditioner baffle comes in. The baffle is extremely convenient, as it dampens the aggravating noise of the unit while also controlling its air flow. Having an RV air conditioner baffle is not only extremely convenient for you but also even necessary for your AC unit. Definitely don’t skip this accessory!
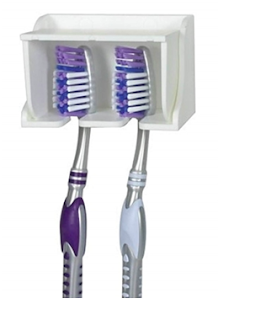
4.Mini Dish Drain
When you have your own RV, chances are you lack a dishwasher. Or, rather, you are the dishwasher. In order to ensure that your dishes dry properly after washing them, you should utilize a dish drain by placing it on your countertop. You could take this a step further by opting for a mini dish drain instead of a standard one in order to save you the most space possible.

5.Cupboard and Refrigerator Bars
Whilst driving around on the open road, you will no doubt occasionally hit some bumps and swerve a bit from time to time. When that happens, you need to focus solely on your safety and not on the breakable goods in your rig.

That is why we cannot recommend installing cupboard bars and refrigerator bars enough. These bars will efficiently keep both your dishes and food safely kept in their places instead of shattering all over the place, causing damage and even dangerous conditions!

6.Motion-Proof Clear Gel
Cupboard and refrigerators bars are all well and good for the items in those specific locations, but what about other more delicate items you have displayed in your mobile abode? Items such as glass vases and knickknacks on top of your cupboards, tables, and other flat surfaces?

Not to worry because we have the answer: motion-proof clear gel. Just a smidge of this clear and non-toxic gel can be placed on the bottom of these types of objects and voila– your glass decorations are safe and secure in your RV!


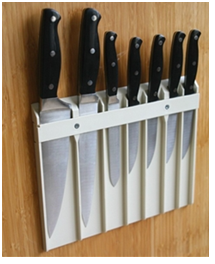
7.Cabinet Knife Safe
On the subject of things bouncing around and falling while you’re driving, the objects that make the top of the list for things you really don’t want to do are knives. Having knives flying around your rig while you’re on the interstate is the definition of a bad time.

That is precisely why we highly recommend you add a cabinet knife safe to your RV. These are seamlessly mounted to the inside of your kitchen cabinet. There, they will stay stationary while you’re driving but also will be kept out of reach of children, too. Plus, they’ll conveniently be located in your kitchen for easy access while cooking!

8.Expanding Broom and Dustpan
No matter where a person lives, they will undoubtedly accumulate dust, dirt, and other nuisance-like particles on their floors. When that happens, you need to, of course, sweep them all up and toss them out.

But, when you live in an RV, it can be difficult to have such a large, awkward object and find a convenient place to store it. In comes the expanding broom and dustpan. Easily expand it when you need it, then contract it when you don’t. Have the convenience of a broom and dustpan while finally being able to place it somewhere out of sight (and out of mind!).

9.Add-a-Drawer Under Cabinet Kit
Let’s be frank: the kitchen is nearly always too small in an RV. You could always use another cabinet, another drawer, or another space of any kind to store your kitchen accessories. Well, if you’ve ever felt this way, then behold your saving grace: the Add-a-Drawer.

You can conveniently and easily install the Add-a-Drawer under your cabinet. This will provide you with another location to store anything you need to in your kitchen without adding to any clutter or taking away any of your much-needed kitchen space. How do you like them apples?

Now that you have seen some of the best RV accessories for vastly improving your RV life, now you need to know where to get them. Be sure to visit our seemingly endless catalog of all things RV and motorhome. If you have any questions, feel free to give us a call or text us at 866-332-7881. Happy road tripping!

Friday, December 10, 2021

Best Motorhome Accessories for Your Mobile Abode


When you have your own motorhome, it is imperative that you not only stock it full with the appropriate and necessary safety equipment but also with accessories to make it optimally comfortable and homey. You need to decorate every area of your motorhome in order to make your mobile abode comfy, inviting, and convenient all at once.

That’s where we come in at RVupgrades. We proudly supply all of our customers with the highest quality of products for their mobile homes, from necessary equipment to aesthetically pleasing decorations.

Looking to perfectly adorn your house on wheels? Let’s take a look at some of the best motorhome accessories for each area so you can finally feel completely at home.

Living Room
Most motorhomes’ doors and stairways lead to one main room: the living room. That is why you should add the most appropriate accessories to this first and foremost in order to properly welcome guests into your home while also providing you with a cozy place to decompress and relax.

To best relax, you will need a recliner. Our Euro recliner chair is made with padded leather vinyl upholstery and a wooden base. It has 360-swivel capabilities and a footrest. Not only is this a great place to sit back and relax, but it is also a stunning fixture to admire and to assist in creating that homey feel.

Another great addition to your living room could be something both exceptionally practical and relaxing: an electric fireplace! By having one of these in your living room, you are vastly improving your R&R at home with warmth in those colder evenings and an unparalleled aesthetic element.

Bedroom
When you find time to sleep between your road-tripping and other excursions, you’ll need a bedroom that lets you slumber in peace and tranquility. That’s why having a high-quality bed sheet set is ideal. With one of our custom sheet sets, you’re bound to find optimal comfort in your bed, leading to seamless and enjoyable sleep.

You could also opt for an RV superbag that will provide you with a cozy bed anywhere you desire one! Our options are ideal for any season as well so you’ll find comfort in your sleep no matter what the temperature is outdoors.

Kitchen
When it comes to your kitchen, you need motorhome accessories that will both provide the room with practicality and unique aesthetics. Fortunately, we have plenty of options for you to choose from that could bring out the best in your kitchen.

We have quaint dishware that is perfect for decorations and everyday use. One prime example of this is our camp casual bowl and serving set. Another practical accessory for your kitchen is a cabinet knife safe, which keeps your knives looking tidy and organized in your cabinet while also keeping you and anyone in your moving home safe from injury.


Bathroom
One of the rooms in your motorhome that really requires the most inviting and comfortable ambiance is your bathroom. No matter what you are using your bathroom for, you deserve a space that is private, clean, and comfortable.

One way of obtaining ultimate comfort in your bathroom is by having an ample amount of room in the shower. This can be achieved with our expanding shower rod. Normal shower rods in motorhome bathrooms can make you feel cramped and uncomfortable. With our extended rod, you’ll be supplied with 30% more elbow room while you shower!

Looking for a place to store your toothbrushes that is convenient and saves you plenty of room? Then opt for our pop-a-toothbrush holder. This product mounts to your wall and has a vented cover for quick and easy drying. All you need to do is pop your toothbrush in and it’s as easy as that.

Outdoor Space
While your indoor space is extremely important for decorating with practical and aesthetically pleasing elements, it’s also vital to equip your outdoor space with the same! This is so you can enjoy the luxury of the great outdoors whenever you see fit.

When you are outside with guests, you should make an outdoor garbage bag holder easily accessible for all. This is important in order to greatly reduce litter and land pollution that unfortunately befalls many campgrounds and other shared outdoor areas.

Looking to enjoy the great outdoors at any time regardless of the weather? Then you should consider investing in one of our one-person pop-up tents. These tents allow you to enjoy the great outdoors while protecting you from the elements, as they are waterproof and have zippered sides with transparent plastic.

Plus, each one of these tents pops right up so you can place it outside your RV quickly and enjoy the sound of rain or wind from your personal tent.

Are you excited to freshen up the look, feel, and convenience of your home with the help of motorhome accessories? Then be sure to browse our many RV accessories and even our newest released motorhome accessories. Give us a call or send us a text at 866-332-7881 with any questions you may have!

Tuesday, December 7, 2021

DIY Campervan Conversions, Camper Parts, & More: Frequently Asked Questions


Whether you are hitting the open road with your own campervan or RV, the excitement and thrill you feel are unequivocal. The feeling of your foot on the pedal, your life being pulled along with you, the open road unfolding and changing before you with every passing moment, and even the sun warming your face through the windshield is indescribable.

Almost every moment on the road can be romanticized, as road tripping is a truly enlivening experience, but this is especially true when you intend on doing so forever in your very own, self-designed campervan.

The trend of building your own campervan has exploded in recent years as more people are working remotely and the desire for exploration and travel has skyrocketed. Since the emergence of COVID and applicable restrictions, a lot has changed on both the national and international levels, including the explosion of #VanLife.

If you are curious about if or how you can indulge in such a unique, exciting, and rewarding lifestyle, you have come to the right place. In this blog post, we’ll dive into the most commonly asked questions about repurposing your own campervan, from costs to camper parts.

Is it cheaper to build your own campervan?
If you were to put all the work into converting a van into a campervan yourself, you would indeed save money. Not only will you end up with a new mobile abode that is particularly catered to your needs and preferences, but you will also accomplish this at the fraction of the cost of buying a completed and brand-new campervan.

This is because you can save money on hourly wages, but also save by using cheaper gadgets, appliances, and other RV parts (second-hand items on eBay or even scrap yard camper parts!).

How much does it cost to convert a campervan?


As you might have already imagined, the cost to convert your own campervan can fluctuate in price. This is because of a wide variety of reasons, such as the size of your van, if you are including a bathroom/running water or not, electrical capabilities, accessories, and other such parts.

However, the average price range for doing so is $5,000 to $15,000. One of the largest expenditures included in this figure is electrical related, which, depending on what you get done, can cost anywhere between $1,500 to $4,000. These costs include providing electricity for items such as a refrigerator, blenders, chargers for laptops and other electronics, televisions, etc.

You will also use a good deal of wood for various design features, like the bed frame, kitchen counter and cabinets, bench for the sofa, and other such areas. Therefore, the wood will be quite a large price as well, but this will depend on how much you will use and which species of wood you opt for.

There are plenty of other items that you’ll need to purchase, which can add up, such as solar panels (ideal for electricity), vents, insulation, an awning, decorations, bedding, mattress, mosquito nets, batteries, propane, and so much more.

What are the steps to convert a campervan?


While you have a lot of freedom in your own DIY camper project, it’s imperative that you follow the appropriate steps when doing so. In doing so, you’ll have your new home-on-wheels set up just right and you’ll save yourself from headaches and unforeseen expenditures in the future.

Here are the steps you should take:

Step 1. Strip and Clean: strip the interior of the van, but be careful to not rip out something you may need, want, or could reuse in the future for something else.

Step 2. Ventilation and Windows: plan and cut holes for windows and/or skylights. Also add in ventilation, especially for the kitchen and bathroom.

Step 3. Roof: convert a low roof to an elevating or pop-up option.

Step 4. Insulation: reduce condensation, improve airflow, and achieve optimal temperature, especially heating, inside by insulating your van with foam, foil insulation, and/or home insulation.

Step 5. Gas and Electricity: this is the most important step and should be taken seriously. If you aren’t sure how to install your gas and electric setups, have a professional handle this particular step. Any small missteps could be disastrous.

Step 6. Water and Plumbing: install plumbing in accordance with what you need, such as for a toilet, shower, and/or a sink. Cold-water set-ups are much easier than non, which typically won’t suffice for showers and toilets. You also will need to install something to collect wastewater. When installing a tank for this, make sure you have carefully calculated your anticipated water usage to get the right size.

Step 7. Let There Be Lights: install LED lights and other lighting options so you can live an even more comfortable life in your van, day or night.

Step 8. Furnishings: install your bed, sofa, and other such fixed furnishings.

Step 9. Kitchen: install your refrigerator, stove, sink, and other fixtures.

Step 10. Storage spaces: make plenty of compartments and areas for storage, like behind doors, under the bed and sofa, etc.

Step 11. Extras: and now for the most exciting part: decorations and other fun extras to make for enjoyable, comfortable, and cozy living!


How long does it take to convert your own campervan?
As you might have already imagined, the answer to this question is the dreaded “it depends.” It can take anywhere from three weeks to three years. It all depends on what you’re looking to accomplish, what your budget is, and your personal timelines.
What are the best vans for DIY conversion?

One of the most important steps in the entire process is one of the first moves you make: purchasing your base van. Here is a brief list of some of the most popular and dependable base vans for DIY conversions:

●Mercedes-Benz Sprinter
●RAM ProMaster
●Ford Transit
●Chevy Express Cargo Van
●Renault Trafic

Where can I buy the best camper parts?
Now that you are preparing for your new and exciting DIY lifestyle project, you’ll need the best parts available. That’s where we come in at RVupgrades. We have plenty of camper parts, RV accessories, and RV supplies, including replacement parts and much more available for you to choose from to make your transportable home functional, comfortable, and livable!

Give our customer service team a call at 866-332-7881 with any questions you may have regarding your RV camper, travel trailer, or the conversion process in general. Welcome to the beginning of your #VanLife!

Wednesday, November 3, 2021

4 Outdoor Accessories Your RV Needs


When you live in your own RV or motorhome, you know what it takes to have the optimal synergy of comfort and safety: a lot. There are a number of precautionary measures you need to take to ensure that you are safe in and around your RV.

You need to consider a host of scenarios and have everything you need in case they do come to fruition. This is why having items like the correct propane tanks, LP fittings, tow bars, and other such parts and accessories is so vital. They provide you with necessary safety measures so you-- and those around you-- aren’t in danger.

 As important as safety measures are to take, once they are taken, it doesn’t mean that your job is finished in terms of stocking your RV or motorhome. You need to properly accessorize it as well! This is where you can really have fun in interior and exterior design to best match your style and personality.

 Because at some point or another you will want to enjoy the outdoors right outside your front door, you should seriously consider your comfort there, too. That is why you need to add several key parts to your mobile abode’s exterior: an awning, RV patio mats, outdoor chairs, and outdoor tables.

1.   An Awning

When you live in an RV or motorhome and often change location, you know that the weather can change at the drop of a hat. It can be a cloudless sky, but then you can see foreboding clouds in your side mirrors.

 Once you find a place to park, you need to be properly shielded from the elements while you sit outside and enjoy the great outdoors. You certainly don’t want to be outside and get drenched by the rain or cooked by the blistering sun! That’s where an awning comes in extremely handy.

 At RVupgrades, we have plenty of awnings for you to choose from so you can properly equip your outdoor space with the perfect piece. We have regular awnings, awnings with attached dangling sunblocker panels, and “add a room”s. Yes, you can even add an easy-to-set-up-and-dismantle extra room to your RV.

 Adding this piece to your Rv will allow you to enjoy both your outdoor space and RV all at once.

1.   RV Patio Mats


When you use an awning, you will be shielded from the elements. However, this can drastically reduce the health of the grass beneath you. The grass will be starved of sunlight and rain, but also you could ruin the grass by continually stepping all over it!

 Not only that but you could even be bothered by the grass and dirt beneath your awning, which could either be drudged into your clean home or even deter you from enjoying the outdoors altogether.

 None of the aforementioned scenarios are enjoyable for anybody. That is where RV patio mats come in to save the day. They can properly protect the grass from under you by providing air circulation and sometimes even sunlight, but also save your feet from gravel, rocks, dirt, and mud. Plus, keep your interior safe from any unwanted tracked nastiness.

 We have a wide range of these RV patio mats that come in varying sizes and designs. Plus, they are all easy to roll out and take away. You can truly improve your outdoor experience with the addition of one of these mats/rugs!

1.   Outdoor Chairs

When you set up your awning and your patio mat, are you intending on simply standing around and that’s it? Most certainly not! That’s why you should most definitely include outdoor chairs. This way, you and any of your guests can lounge around atop the patio mat and underneath the awning.

 We have plenty of perfect outdoor chairs to choose from that can perfect your outdoor space. We offer everything from simple foldable chairs to foldable rocking chairs! 

2.   Outdoor Tables

Amongst your awning, patio mat, and chairs, you should have an outdoor table as well. An outdoor table can provide you with the optimal comfortability you deserve in your outdoor area. This is because, while you’re enjoying the great outdoors, you should have a specific place for putting your various belongings.

 With an outdoor table, you and your guests can place your drinks, food, plates, silverware, playing cards, citronella candles, and other smaller items. Without a table, your items will be all over the place! For seamless enjoyment for all those involved, we highly recommend the use of a table specifically designed for the outdoors.

Are you ready to take your RV’s outdoor space to the next level with the help of items like awnings, RV patio mats, outdoor chairs, and outdoor tables? Then have a look at our outdoor living section to make sure you have everything you need! Give us a call at 866-332-7881 if you have any questions. 

Tuesday, October 19, 2021

Should You Use a Husky Weight Distribution Hitch?


There are many different types and classes of trailer hitches. Regardless of the type of hitch, the class of hitch determines the load it’s equipped to carry when paired with a vehicle that can accept it.

-       Class I hitches are for light trailers only, typically rated up to 2,000 lbs gross trailer weight (GTW). Tongue weight (TW) should not exceed 200 lbs.

-       Class II hitches are for medium weight loads and are usually rated to 3,500 lbs gross trailer weight. Tongue weight should not exceed 300 lbs.

-       Class III hitches are for “large” loads and trailers. Typically rating allows maximum gross trailer weights of 6,000 lbs, with tongue weight not to exceed 600 lbs.

-       Class IV hitches are also for large loads and are typically rated up to 10,000 lbs, with tongue weight not to exceed 1,000 lbs.

-       Class V hitches are for the largest trailers and accessories, and may be rated up to 12,000 lbs; tongue weight should not exceed 1,200 lbs.

There are also a wide range of different types of trailer hitches, such as front mount trailer hitches, 5th wheel trailer hitches, rear receiver trailer hitches, gooseneck trailer hitches, pintle hitches, and others - including special types of trailer hitch known as a weight distribution trailer hitchs. Here at RV Upgrades, we offer a wide range of different weight distribution hitches, including Reese and Husky weight distribution hitches.

Here’s something else. The maximum gross trailer weight within a given class can actually increase when a weight-distribution hitch is used, which means that all things being equal, it may be possible for you to safely tow larger loads with a qualified weight distribution hitch like a Reese or Husky weight distribution hitch.

But to understand why, we need to take a closer look at tongue weight, what it is, and why it matters. 

Tongue Weight: What It Is, Why It Matters 

Gross trailer weight is the weight of the trailer and the load you are towing. This weight does not change and cannot be altered except by lightening the load. Tongue weight, by contrast, is the force that presses down on the tongue of your trailer, at the point where it connects to the hitch. While gross trailer weight cannot be adjusted without altering the load itself, tongue weight can be adjusted with a weight-distribution hitch.

While every hitch has its own specifications, as a general rule of thumb, it’s an accepted best practice not to allow tongue weight to exceed 10% to 15% of the gross trailer weight. Take a look back through the hitch classes above and you will see that the accepted tongue weight for each class lies at 10% or less of the gross trailer weight.

Gross trailer weight affects the handling of the vehicle towing it, to be certain, but tongue weight has a pronounced effect on handling. Tongue weight that is too heavy will shift too much of the load to your rear axle, raising your front axle slightly.

This could result in a number of problems. For one, it will alter your visibility, which can be a hazard. It will also handle the braking performance of your towing vehicle, and since the front axle will be lifted slightly, it can adversely impact your ability to steer effectively. You may also experience trailer sway, which can make it difficult to handle a load safely and effectively.

Sometimes it isn’t always apparent that tongue weight is too high, but let’s cover some of the basic signs that may give it away.

Signs Your Load Is Too Heavy or Poorly Balanced 

If your tongue weight is too high, you may experience some of the following signs that can tip you off:

-       Your load is swaying slightly back and forth while you’re trying to maintain a straight course (trailer sway).

-       Your towing vehicle’s headlights seem to be angled up and off of the road, or are just too high.

-       You can actually see that the rear of your towing vehicle has visibly dipped toward the road when the load is hitched up.

-       You notice a pronounced difference in handling when turning or braking.

If you experience these issues, a weight-distribution hitch may be able to help. Another reason you might want to invest in a Husky weight distribution hitch is if you simply want to tow the maximum capacity load permitted, given the specifications of your vehicle and tow hitch.


How Does a Husky Weight Distribution Hitch Help? 

A weight distribution hitch, like a Husky weight distribution hitch, basically does exactly what its name suggests. It redistributes weight across the hitch and axles so that all of the weight does not fall on one point. Many weight distribution hitches use a system of spring bars that redistribute the weight so that the force affects all of the axles more equally. This means that weight distribution hitches can help with sway control, handling, and safety.

Because weight distribution hitches are specifically designed to help redistribute weight, they are generally reserved for larger loads like campers. By redistributing the weight, weight distribution hitches make it possible for your hitch to tow its maximum capacity. For example, although Class V hitches are typically rated to a maximum gross trailer weight of 12,000 lbs, with a weight-distribution hitch, Class V hitches may be able to tow loads up to 17,000 with a tongue weight not to exceed 1,700 lbs.

It is important to note here that you must be familiar with the limitations and specifications of your specific hitch and vehicle. The numbers given in this article are estimates and not manufacturer specifications. Moreover, a weight-distribution hitch does not enable your vehicle to tow higher loads; it only enables your hitch itself to more effectively manage heavier loads by redistributing the weight of the load.

Get a Husky Weight Distribution Hitch Here!

If you have any specific questions about our different weight distribution hitches or how much you can tow, please feel free to contact us at 866-332-7881 and we will be happy to help make recommendations or suggestions.

Friday, October 15, 2021

On the Fence about a Water Softener for Your RV? Read This


Of the many responsibilities you will have to manage as an RV owner, a water softener system might not captivate your interest or be the primary focus of your attention. All the same, even though a water softener for your RV might not be the most exciting of RV accessories, an easy-to-use, dependable system that protects your RV from hard water scale can actually be a highly valuable investment.

Let’s take a closer look at how a water softener for your RV actually protects your RV against hard water and why it matters in the long run. 

What Is Hard Water Scale? 

To understand why a water softener for your RV is worthwhile, we need to understand what hard water scale is and what causes it.

Water is typically referred to as either hard or soft, depending on its concentration of dissolved minerals. Soft water is typically low in dissolved minerals, whereas hard water is water that contains a high concentration of dissolved minerals. Numerous minerals may be contained in hard water, but the two most common minerals present in hard water are calcium and magnesium. Groundwater that comes into contact or filters through limestone or chalk is typically fairly high in concentrations of these minerals.

Hard water is not universally considered a bad thing, and it’s even been said that hard water has a better flavor than soft water or that hard water can help supply your diet with essential minerals. That being said, hard water can be a problem for your RV, its plumbing system, and its appliances. 

Does Scale Really Pose a Threat to My RV? 

Hard water is present across the United States in varying concentrations, with much of the country receiving either “very hard” or “moderately hard” water designation by the United States Geological Survey.

If you consistently expose your RV’s plumbing system and appliances to hard water, you could be incurring damage that, though not irreversible, can be very costly to rectify.

When you run hard water through a pipe, it leaves behind a very small deposit of a material called scale. Scale is a conglomeration of the dissolved minerals in the water that accumulates on the inside of pipes or fixtures. After a while, scale builds up on the inside of pipes, resulting in two pronounced negative effects.

One is that a buildup of scale inside of your RV’s plumbing system can diminish its flow rates, which is an inconvenience. However, scale accumulation also increases the water pressure within the pipes, which can damage the plumbing system, its fittings, and appliances as well. Rectifying hard water damage after it has progressed beyond a certain point can be expensive and may necessitate the replacement of pipes and fittings.

Hard water scales will also accumulate on faucets, in sinks, and within appliances. At first, it will present as nothing more than a cloudy discoloration or off-white or yellow stains, but over time, the scale will continue to accumulate, resulting in unsightly spotting and discoloration.

While scale can be removed from faucets and sinks, it is difficult to take off and usually requires quite a bit of elbow grease. When scale accumulates within plumbing fixtures and appliances that draw water, the higher pressure can damage them, requiring extensive repairs or even replacement.

Hard water also makes it hard to create soap suds and some say it leaves an unpleasant feeling on skin and hair. In addition, hard water leaves deposits on glassware and serving ware and can make laundry appear dull or “washed out.”

The adverse effects of hard water range from minor inconveniences to the potential to cause serious damage to your RV. On the lookout for hard water? Keep your eyes peeled for these signs.

Need Proof? Here Are Signs of Hard Water Scale 

The following are some of the telltale signs that your RV is experiencing hard water damage. Stay on the lookout for these and you may be able to stop hard water damage before it becomes serious.

-       Lower water pressure in your RV, from your sinks, showerheads, and through appliances.

-       Spotting on glassware, dishes, or silverware.

-       White or yellow stains on sinks, basins, tubs, shower walls, and floors.

-       Your skin or hair feels like there’s an odd film on it after you bathe.

There are other signs of hard water, but these are some of the biggest signs, specifically spotting or staining on fixtures or appliances. If you’re in doubt, you can always use water test strips to be sure.

So, then, the question becomes one of what you can do about it? 

How Can a Water Softener for My RV Make a Difference? 

The answer to the hard water problem, especially for an RV that might be visiting multiple areas of the country and thus multiple diverse water sources, is to use a water softener for your RV. Here at RV Upgrades, we sell a variety of practical portable water softeners that are easy to use, cost-effective, and highly efficient at eliminating hard water, thereby protecting your RV’s plumbing and fixtures.

For example, the On The Go OTG4 Portable RV Water Softener uses a standard hose connection between your RV and the park faucet and requires no tools to install or use or any electricity to operate. It can provide anywhere from 320 to 800 gallons of soft water before it needs to be recharged, and even then you can recharge it with common table salt and potassium chloride.

Other water softeners for your RV are just as easy to use and can recharge easily by adding salt and potassium chloride. We have many water softeners that have varying capacities and water flow rates as well, to meet your specific needs.

With so many different solutions to hard water in the form of RV portable water softeners that are easy to install, use, and recharge, there’s no reason why you shouldn’t be able to provide your family with soft drinking water and protect your RV from the effects of hard water. 

Contact Us to Learn More

If you have any questions about how hard water can damage your RV, how to detect it, what you can do about it, or simply about our products, feel free to get in touch with us. We pride ourselves on our customer service and are here to help - contact us at 866-332-7881.

Tuesday, October 5, 2021

Shopping for RV Portable Waste Tanks: Make Your Life Easier


Portable RV waste tanks may not be the most exciting of RV accessories, but they certainly do play a big part in ensuring comfort when you’re out on the road or in camp. Waste holding tanks that are manufactured to a high standard of quality, especially larger ones, can minimize your trips to the dump station and help contain odors. Here’s what to look for when you’re shopping for a new RV portable waste tank.

Capacity Counts 

Possibly the most important feature of RV portable waste tanks is capacity. It’s a low tech feature, but all of the other attributes we mention in this article won’t be worth very much if your wastewater tank just isn’t big enough.

Four main factors will influence how much space you need in a portable waste tank: How many campers will be along for the trip, how long the trip will be, the space you have in your RV, and the size of your holding tank.

Obviously, you can’t choose a tank that is too large for the space you have allotted to it. You should also ideally choose one that is large enough to carry the entire contents of your gray or black water tank, if possible. 

Integrated Handles and Tow Brackets Save the Day 

Let’s not forget that you need to transport your RV portable waste tank from your RV to the dump station. Even if your portable waste tank isn’t a 42 gallon or a 36-gallon behemoth, water is heavy. A “small” 16 or 25-gallon portable tank will still be really heavy when full.

That’s one of the reasons that integrated tow handles are so valuable. They make it a lot easier to transport and dump your RV’s portable tank at the dump station, and some of them even include tow brackets so you can tow the tank to a dump site instead of lugging it over there by hand. 

Pneumatic Tires for Effortless Transport 

Pneumatic is just a buzzword for a tire that is full of air instead of being made of solid rubber. While solid rubbers are tougher and require no maintenance, pneumatic tires roll more smoothly and absorb some of the bumps of uneven roads.

They also tend to have a larger diameter, which means they are much more capable of rolling over rough terrain. While solid rubber wheels are acceptable for smaller RV portable waste tanks, it makes sense to get pneumatic tires with a larger model. 


Blow Molding and Plated Components Go the Distance 

Since RV portable waste tanks have to carry a lot of weight and are subjected to a lot of other forces while transporting them, sometimes fewer components are better. Read the fine details: many portable waste tanks are made with blow-molded polyethylene and feature plated hardware.

Blow molding is a trusted plastic manufacturing process that creates tough plastic shells and shapes with stronger seams (or, depending on the item, no seams). Plated hardware is also a bonus because it is less subject to corrosion. The tougher, the better; you don’t ever want to experience the failure of a portable waste tank. 

Look for a Level Gauge and Avert Potential Spills 

Level gauges are used to detect the levels of liquids in all sorts of different tanks. In waste tanks, the same principle applies; level gauges help you determine how full a tank is and helps to eliminate guesswork.

In some situations, lack of a level gauge might just be an annoyance, but with the sanitary concerns surrounding waste tanks, a level gauge is a really valuable feature. Determining the level of a portable waste tank can help you prevent overfilling them, which in turn can prevent spills. Check the product features in our collection of RV portable waste tanks and choose one with a level gauge - especially if you get a larger model. 

Choose a Model That Has Everything You Need  

Some of our RV portable waste tanks come with a bayonet cap, a sewer hose or sewer connections, hose clamps, and adapters - in other words, everything you need to fill, transport, and then empty the tank at the dump station. Buy an all-in-one unit and save some time down the line. 

Word to the Wise: Have Holding Tank Treatment on Hand 

One more note. You should consider buying a holding tank treatment. Some treatments like the Camco TST Holding Tank Treatment are 100% biodegradable, safe for septic tanks, and can easily keep a lid on odors for up to a week. They’re worth the few dollars they cost. 

Call Us with Questions

Do you have questions about our RV portable waste tanks? Would you like a recommendation? Contact us at 866-332-7881 and we would be glad to help - you can even text us at the number if it’s easier for you.

Friday, October 1, 2021

A Primer on Keeping Dirt Out of Your RV (with Patio Mats and Other Best Practices)


For die-hard RVers and other campers, camping season is a year-round season. That puts more of the year at your disposal, but it also means that you need to reckon with the dreaded mud season in some parts of the country.

A muddy RV interior is a morale dampener. Beat the mud and dirt with these tips and tricks. 

1.    Be conscientious about your choice of location

The first step you can take towards safeguarding the cleanliness of your RV interior is sort of a passive one. Just be smart about where you park your RV.

We get it. You can’t always choose exactly where you want to park. After all, you need to park somewhere safe, reasonable, and ideally level, and those locations are not always mud-free. Realistically, parking areas at campsites are often very muddy expressly because of the high traffic that keeps grass from growing.

You can’t always avoid mud and dirt, but if you can, you should. Wherever you end up parking, the people with you will have to walk through to get in and out of your RV. Simply choosing a space that’s less muddy can help you in the long run.

2.    Leave muddy shoes outside, by the door - or have a dedicated space for them inside

For those times when you can’t avoid the mud, the next best thing is to enact a rule for all fellow campers to observe: leave boots and shoes outside.

You can’t keep all mud, dirt, leaves, gravel, and other debris outdoors, but by observing this simple rule, you’ll keep the lion’s share of mud out of your RV interior. It’s also an easy habit to observe and enforce. Just get into the habit of taking off your boots and shoes and leaving them outside by the door.

What can help with this effort is if you bring along a dedicated pair of indoor shoes, slippers, or sandals. That will mean you rarely need to bring your outdoor shoes indoors, except when you’re packing up and traveling. And, by the way, when you are on the road, have a dedicated, waterproof bin for outdoor shoes.

3.    Get a boot brush and boot tray

If you can’t leave your outdoor shoes outside or it doesn’t make sense to do so, then you should get a boot brush and a boot tray.

Get in the habit of using the boot brush anytime you plan on entering the RV, and be thorough about it. Most boot brushes have bristles that are poised to clean the sides of your boots as well as the treads on the soles, which is a boon because mud sometimes tracks up to the tops of boots.

You should also have a boot tray somewhere right along or inside the vestibule of the RV. Have occupants brush off and then remove their boots before entering and placing them in the tray.

4.    Bring along a whisk and broom

Being prepared for mud entails more than mud prevention. You need to be ready for when mud and other dirt make their way into your RV. Bring along a whisk and a full-sized broom to help you be better prepared. A whisk will help you spot clean small areas that have noticeable dirt; as for the broom, use it to brush off the steps of your RV periodically, from top to bottom.

5.    Have a small vacuum at the ready

While both whisks and brooms can be instrumental at spot-cleaning and keeping your steps clear of dirt and mud, sometimes it gets into corners and on rugs. It’s pretty hard (if not impossible) to clean these surfaces with a broom alone, so you’ll want a small car vacuum or a vacuum with attachments that will help you clear it out.

6.    Use RV patio pats in and around your outdoor living spaces

If you’re going to spend a lot of time living outdoors at the campsite, such as around a fire ring or under your RV awning, make it a point to bring along RV patio mats. Many patio mats are carefully designed to prevent dirt, mud, sand, and more from being tracked into your RV.

Many RV patio mats are made with a unique weave that allows dirt and sand to filter through one way but prevents them from coming back up to the surface. Just using outdoor area rugs like these in areas with high foot traffic can help prevent dirt from getting tracked through your RV’s interior.

Plus, RV patio rugs are available in a wide range of sizes, colors, and patterns for your outdoor spaces, and many are stain-resistant, fade-resistant, eco-friendly, and easy to clean. Many of them can be easily swept or hosed right off, and are resistant to UV, mold, and mildew! Some of them are even reversible, and there are plenty right here on our site that are available in a wide range of unique patterns and colors, for any setting.

Dirt Is the Enemy! 

Armed with these tips and tricks, you should be better prepared to keep mud and dirt from getting tracked through your RV, which, by the way, is not just a cosmetic issue.

Yes, dirt and mud are unattractive and can make your indoor carpets and floors look drab and worn out, but over time, dirt and mud can adversely affect the value of your RV, potentially even impacting resale.

Take these steps and be proactive about keeping your RV clean and clear of mud, sand, dirt, and other debris. You’ll enjoy your camping trips more and you’ll be safeguarding the long-term value of your investment!

Contact Us! 

Whether you’re looking for an RV outdoor patio mat or another outdoor rug, a boot rack, or a vacuum, you can find most of your mud-fighting equipment right here at RV Upgrades!

Take a look through our collection and if you have any questions or would like more suggestions or recommendations, get in touch with our customer service team at 866-332-7881.

Tuesday, September 7, 2021

What to Stock Up On for Your RV Fridge


Camping is all fun and games until it’s time to start packing up the camper or RV. Much like packing a suitcase for vacation, you need to pull out all the stops with your organizational skills. Since you’ve got more surface area to cover with getting prepared for the trip ahead with an RV, it can be difficult to narrow down everything you might need for your upcoming road trip.

Other than the basic camping supplies, clothing, and other essentials, there is one thing that needs close and special attention before heading out on the road ahead. That one thing has got to be the RV refrigerator. Now, depending on how long your trip is going to be, it all depends on how you need to pack, organize, or utilize your fridge.

The most convenient thing about owning an RV is that since it doubles as an actual vehicle, you’re able to run to the store to pick some things up if you run out of groceries. It’s so much easier than having to take a cab to the local store or resort to only eating take-out for the duration of your trip.

One of the best things about camping, specifically camping in an RV, is still being able to provide home-cooked meals to you and your family either over the campfire or inside your RV’s kitchen.

But first, most RV’s are not accompanied by their own fridge, so you must have to supplement that one yourself. Or, if you’ve had your RV fridge for a long time now, this might be the best time for a replacement. These kinds of refrigerators have changed immensely over the past few years, but all to the benefit of the RV owner since most are now much more compact and efficient.

No matter what situation you’re in, you need to know how to find the best fridge for your RV, so here is a quick buyer’s guide to help get you started.

RV Fridge Buyers Guide 

Compared to the fridges that we have at home, these compact refrigerators work a bit differently. RV refrigerators are technically classified as absorption refrigerators, as condensation and evaporation are what cools down the fridge. Different power sources are used for these small fridges such as propane and electricity to allow them to work properly.

Depending on your needs as an RV owner and the actual size of your camper will help determine the size of fridge you need. If you have a big family, you’re going to need to store more food at one time, so you’ll most likely need a larger refrigerator and vice versa.

Once you narrow down the size you need and whichever brand you might want, now comes down to the fun stuff. What kind of special features would you like for your fridge? Some of these fridges offer some fancy amenities that might be hard to pass up.

Just like residential fridges, RV fridges can offer ice makers, adjustable thermostats, fridge freezers, fruit and vegetable crispers, and much more. Whatever you need to properly store your food and drinks, you’ll be able to find them in one of these fridges.

However, there’s one important measure that needs to be taken into account. Considering you’re going to be driving around in an RV means that some things in your fridge will eventually move around. Depending on the terrain you’re taking the RV through, sometimes it’s necessary to use the proper accessories to ensure nothing goes flying out of your fridge or spills inside.

Fridge Accessories

Much like for everything else for RV living/camping, there is going to be some sort of accessory for it. That also remains true for the fridges, as well. During travel, a lot can possibly go wrong inside the fridge, so some small accessories are just the thing to prevent any spillage or movement inside.

To hold everything in place, we suggest refrigerator bars. These bars can be placed in front of the contents of your fridge to hold everything in place while on the move.

 In order to keep the air flowing and make sure everything stays as cold as possible, a refrigerator fan is a must. This small fan keeps the cold air circulating in times where the fridge may not reach the coldest temperature possible.

All in all, we think it’s very important to prioritize the fridge of your RV or camper. This is the best way to fully enjoy your trip and not have to worry about the food and drink situation. You can find all of the necessary accessories and actual fridges from us at RVUpgrades.

If you have any questions or concerns, we are always happy to help in any way possible.

Tuesday, August 3, 2021

3 Best Water Softeners for Your RV


Is there any better feeling than when you’re driving your RV on the open road and the wind is whipping and whistling through the open windows and onto your face? It’s a moment entangled with freedom, leisure, and unadulterated bliss. The road and even the world is yours. However, you will need to take plenty of breaks during your blissful road trip in order to explore, sleep, eat, and use the facilities, whether they be in the RV or not. Therefore, it’s imperative that you are prepared for each one of these occasions.

You will need to be prepared for anything on your road trip. Having updated and functioning appliances in your RV is an important step in your preparation. That’s where we come in at RVupgrades. We understand your love for RV life, but also understand your necessity for safety and comfort when inside your RV. We are here to supply you with all the necessary equipment and other objects you need for flawless and hitchless road traveling.

One aspect of your RV you need to constantly be wary of is your water. Having a water softener is something every RV should have within it. This is because it can extend the life of appliances, prevent rust stains and hard water, improve the taste and color of your water, and improve your skin health. Why wouldn’t you want that in your RV?

You should know the best water softeners for your RV so you can be one big step closer to finding the right one for you. Here are the best three water softeners for your RV so you can get yours faster, then hit the open road sooner.

1.  FlowPur M7002 RV Pro

This is one of our most popular water softeners to date and it’s no wonder as to why. The FlowPur M7002 RV Pro Water Softener is easy to install, as its included head fitting makes the process quick and painless, so you can get to enjoy its benefits sooner rather than later. It has a 10,000-grain capacity and has a high flow rate of four gallons per minute (GPM) without affecting the water pressure. It’s also at a comfortable weight size of 26 pounds, while its overall size is also convenient at 20½ inches in height and eight and ½ inches in diameter.

Its regeneration time is another impressive aspect. It is already regenerated when you first install it, which makes for one alleviated concern. When it does need to be regenerated, it will only take twenty minutes and requires either potassium chloride or table salt. There is also a convenient instruction manual with clear-cut instructions on how to successfully accomplish this. The warranty on the tank is also an astounding five years, while the head is for one. You really cannot go wrong with equipping your RV’s kitchen and bathroom with this water softener.

2.  On The Go OTG4-DBLSOFT Double Standard Portable Water Softener

The On The Go OTG4-DBLSOFT Double Standard Portable Water Softener is an excellent option for affordability, function, and dependability. It provides soft water to your RV for 10-32 days and can be used with any RV. Its 16,000-grain capacity allows for superb filtering and softens 500-1600 gallons before regeneration is necessary. When regeneration is indeed necessary, it usually only takes around 30 minutes to complete. One of the greatest aspects of this water softener is that it requires salt, but it isn't too picky on what kind you use for regeneration. It could be potassium chloride or table salt.

Its GPM is impressive, too, at an impressive 4.5, making the pressure strong enough to shower, wash your hands, and wash dishes effortlessly and potentially joyfully. It's also one of the most convenient sizes for these products. It weighs 32 pounds and is 22 inches by 9.5 inches. Your RV, its water, and even you will certainly be happy with this water softener.

3.  On The Go OTG4-StdSoft Portable Standard RV Water Softener

On The Go strikes again with yet another sensational water softener to better your RV and its water. If you are looking for practicality with proper function, then this is the softener for you and your RV. Carrying will be simple with this one, as it has an easy-to-carry handle at the top and weighs 24 pounds full, but only 18 pounds empty. It’s also 22 inches in height and 6 ¾ inches in diameter, making for an excellent and easy fit for any RV. The design of this softener focuses heavily on being compact and lightweight. Therefore, whether you’re installing it or simply moving it elsewhere in your RV, it’ll be easy to both carry and move. This softener takes your efforts and energy seriously, but also your drinking and cleaning.

The positives don’t end there. It has a spectacular lifespan of 7-10 years, so you won’t need to worry about it for a long while. This fine softener takes either potassium chloride or table salt during regeneration, and the regeneration process only takes 15 minutes. Through each regeneration, you will be provided soft water for 20 days, but specifically 320 to 800 gallons of it. You really cannot go wrong with this softener, as it is one of the best water softeners for your RV.

Purchasing add-ons and other exciting appliances for your RV can be an exciting experience, but it can also be daunting because there are just so many options available to you. However, you should take the water within it seriously because you use it on your body and in it through cooking and drinking. Therefore, adding any one of the above best water softeners for your RV is good practice. Whichever one you decide to choose, you can take comfort in knowing that your RV and its water are in good hands so you can focus more on that relaxing and freeing drive and less on your water.